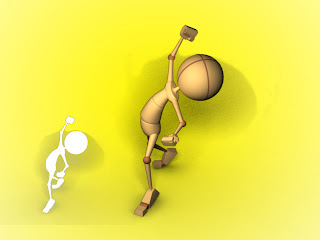
Hello again! I'm back with some tips and tricks. But first let's start off with some serious advice:
Ok.... so
you shouldn't blame your parents if you don't succeed..but hey I
tried.
Onward!
This week you finally start animating! The bouncing ball is so simple
yet so important.
You will
see throughout this entire class that it's used as a base for so many
things. For now... it's just a ball... bouncing :P
First off,
please please go film some reference! Here's some I filmed:
But you
really should film your own for practice. There are a lot of tips
that you'll get from other students as well as your mentor about a
bouncing ball, so I won't dwell on it this week. Just make sure that
your curves look real nice in the graph editor. This animation will
be great or not so great based on the curves.
Now what I
REALLY wanted to spend time on today is the pose assignment!
I want to
talk a little bit about the evolution of a pose, and most importantly
what “EXCITEMENT” really means.
You have
already done one posing assignment; however this time you have to fit
a mood. So what exactly IS excitement?
EX-CITE-MENT:
A feeling
of great enthusiasm and eagerness.
Something
that arouses such a feeling; an exciting incident
(Google
dictionary).
How do we
as humans portray excitement? There are SO many ways. I highly
recommend giving your pose a background story.
-Did Stu
just get a Nintendo 64 for Christmas?
-Did he win
he lottery?
-Is he
getting married?
There are
an infinite amount of stories you can come up with. Next is how you
portray it:
-Is Stu
jumping thru the air because he can't hold in his emotion?
-Is he
stretched out and reaching for the sky?
-Maybe Stud
is a bit more timid, so he holds that excitement in close to his
body.
Think about
these things.
Now here's
the evolution of my own personal excitement pose. It's a bit cliché,
but we all have to start somewhere.
So we start
out with our sketches of course. Draw a lot. Just because you fill up
one page doesn't mean you have to stop. It's good practice anyway:
Next you
pick out your favorite and define it:
The pose I
chose was circled and I drew it again in Photoshop I defined the
line of action and in my head I gave him a story: He's at a sporting
event and his team just scored. I can relate since I'm a huge Blazers
(Basketball) fan.
I wasn't
sure how to improve it, which is why I posted it. A fresh set of eyes
can always help you fix your problems.
My peer
buddy gave me a draw-over, explaining that I should carry the line of
action all the way to the back leg:
I took the
feedback and reposed it:
After
posting it to my Public review again, I got feedback about the back
leg being difficult to read, and that the spine looked a little
broken...so I refined yet again! This is what I turned in to my
mentor:
I felt
pretty good about the pose overall, but was eager to receive feedback
from my mentor so I could improve it.
Here's what
my mentor suggested: He told me I should rotate the hips back to help
the back leg be even more clear. He also suggested I make the front
leg more straight so the line of action flows thru it better. Add in
a few minor tweaks for polish
And voila!
Here's the final product:
Now is it
perfect? Of course not. But it was week 3 or 4 and I had a final
product work showing. Eventually you will improve and be able to look
back at your old work and realize how far you have come.
Good luck
this week and have fun with that bouncing ball and the pose!
Message me
if you have any questions!
~Bsly


No comments:
Post a Comment